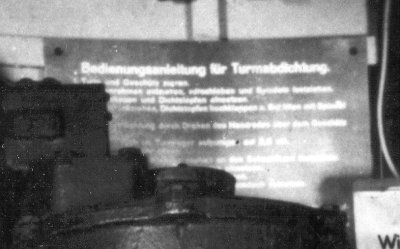
About this detail of the Tiger
The first few hundred Tiger 1 were capable of underwater travel. To achieve this the crew had to spend about half an hour preparing the tank. The turret was manufactured by Krupp who thoughtfully provided an instructional panel on the left inside turret wall, beside the commander, listing the actions necessary to seal the turret. The hull required to be sealed as well; the steps to do so were listed in its manual.

This is a detail from a wartime photo of the panel in the Bovington vehicle's turret. The panel is black with white lettering, 280mm by 210mm. This panel has been lost as far as I know. I can find no clear photographs of it, nor a full copy of the wording. However, thanks to Volker Kuhn, Markus Hahndorff, Sascha ten Have and Thaddeusch Vogel who donated their time, we have reconstructed an image of the panel:
This image, based on other photos, a wartime English translation, vocabulary from various diagrams, and the Turret Manual (see below) contains what is very probably the exact wording of the panel. The font is the best approximation I can find at present. The numbers from these actions were painted on the appropriate pieces of equipment in the turret, in white digits with rectangular red borders.
There were at least two versions of these sealing instructions. When the turret was redesigned and simplified (new cupola etc.) these instructions had to be changed. Fortunately, the Turret Manual contains full instructions for sealing the later kind of turret. Here they are:
Manual's Instructions for Later Turret
Bedienungsanleitung der Turmabdichtung.
1 Turm und Geschütz zurren. 2. Dichtrahmen der Walzenabdichtung entzurren, vorschieben und Spindeln festziehen. 3. MG ausbauen und Dichtstopfen einsetzen. 4. Turmzielfernrohr zurückziehen, Dichtvorrichtung hochklappen und Dichtstopfen mit Spannvorrichtung gegen Öffnungen der Walzenblende drücken. 5. Wiegenabdichtung durch Drehen des Handrades festziehen. 6. Dichtschlauch des Turmes auf 2,5 atü aufpumpen. 7. Wasserablaufrohr öffnen. 8. Rändelmuttern der Klappschrauben an den Sehschlitzen in Turmwänden und Pz-Führerkuppel festziehen. 9. Dichtring und Druckring am MP-Stopfen einsetzen und Mutter anziehen. 10. Knebelschrauben der Notausstiegklappe nachziehen. 11. Wasserdichte Mündungskappe aufsetzen. 12. Haube für Aufbaulüfter aufsetzen. 13. Turmluckendeckel schließen und durch Drehen am Handrad verriegeln. 14. Luckendeckel der Pz-Führerkuppel schließen und durch drei Knebel verriegeln. 15. Zum Richten und Schießen nach dem Auftauchen sind der Turm und das Geschütz zu entzurren und mindestens die Dichtungen Ziffer 2 bis 6 zu lösen.
These instructions are more verbose than the first set, and I don't know if they correspond exactly to the new panel that was presumably installed in the new turrets. It's likely that the panels were more brief than the manual due to lack of space. Apart from that, it's interesting to see what changes were made between the turret designs. Action 14 from the old set has been deleted, because the inner seal of the turret ring is no longer present. But the crew are now reminded to tighten up the locks on the escape hatch.
For those of you who can't read German, here is an English translation of the first panel, made by the British Army while evaluating the tank:
1 Lock turret and gun. 2 Free mantlet sealing frame, push forward and secure by means of locking nuts. 3 Remove M.G. and fit in sealing rod. 4 Draw back telescopes, turn sealing stopper upwards and clamp slide with locking nut. 5 Staunch gun cradle by turning handwheel above the gun. 6 Pump the sealing hose in the turret race up to 2.5 atmospheres. 7 Open water drain tube. 8 Tighten the nuts on the vision slit frames. 9 Open the tommy gun ports and fit sealing stoppers. 10 Fit water-tight muzzle cap. 11 Fit sealing cap on the ventilating fan exit in the turret roof. 12 Close hatches. 13 Tighten levers in the commander's cupola. 14 In the event of the sealing hose not being tight and letting water through the drain tube, close drain tube and tighten inner sealing ring in the turret. To lay and fire after emerging, sealings 1 to 6 and 14, at least, must be opened up.
Very soon after the new turret was introduced, all underwater capability was deleted from the Tiger's design, and presumably this panel was no longer carried.
[2] Factory drawing 2AKF31861U1B11: Turmgehause (overall turret armour)
