About this detail of the Tiger

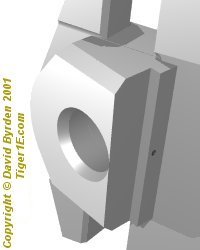
The frontal armour of the turret was 100mm thick, but most of it was absent to make way for the gun mantlet. It was therefore made of two bars, which were fitted into the sides of the turret. Slots were cut in the turret walls to hold them. The ends of these these slots matched up with the edges of the cheek pieces, as seen in the picture above.

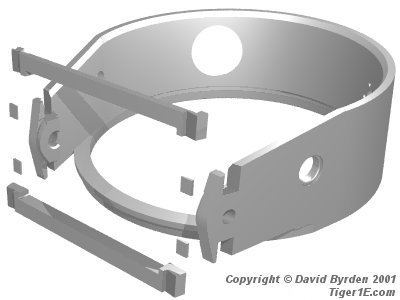
It was difficult to get a good fit because of the size of the steel plates and the awkward angles of the cuts. Therefore, four steel shims were hammered into the slots behind the bars to hold them firmly. The picture above shows the two bars and the four shims before insertion. I am guessing that the cheek pieces were welded into place before the bars.

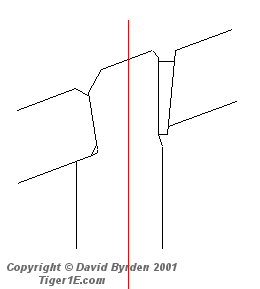
This diagram of the right-hand side shows how the shims fitted behind the bars. The bars protruded about 10mm beyond the walls. The exposed edges were welded inside and out, so you won't see these shims in photographs.

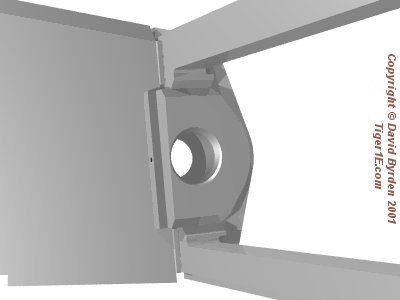
Seen from inside, this is the left-hand front of a late-model turret, as it might have appeared during manufacture. You can see that the bars above and below mate exactly with the cheek piece, forming a rectangular opening for the gun mantlet. The joints will be filled with weld. All of these front plates are tilted by 5 degrees to vertical.
[1] Factory drawing 2AKF31861U1B12: Turmgehause (turret front plates)