About this detail of the Tiger
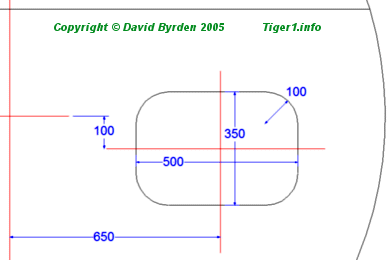
The Tiger 1 had a hatch for the loader in the turret roof. There were different versions of the hatch, but the opening was the same size in all cases; 350mm x 500mm.
The loader's hatch had a complex locking mechanism. Four arms on the bottom of the hatch could be extended or withdrawn by moving a small lever. To lock the arms tightly in place for underwater travel, there was a handwheel.
The hatch was heavy, so a decision was taken early on to provide a counterbalance. In November '42, counterbalances were designed for both the commander's and loader's hatches [2] . This involved the addition of a prominent curved arm to the loader's hatch.
Photographs show that a few tanks had the improved commander's hatch alongside the old loader's hatch. One such tank, in the 501st, had side track gruards.
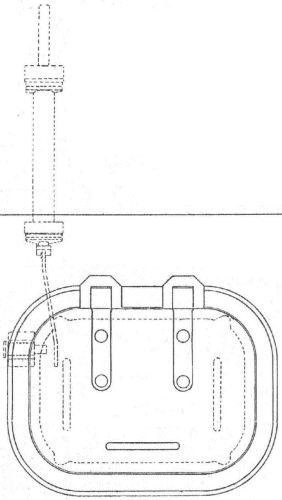
As shown in the diagram above, the loader's counterbalance comprised a spring-loaded plunger fitted under the turret roof. This pushed against the arm on the side of the hatch. This arm has been broken off both the 'Aberdeen' and 'Bovington' museum vehicles, and photographs show that it sometimes broke off (or was removed) even while a tank was in service. The Saumur vehicle still has its arm, but it is slightly bent.

Thanks to the counterbalance the hatch could be propped open at an angle, but only while it was leaning to the rear. If you pushed it past the vertical, it would fall forwards on to the roof. There was a hole in the end of the arm, and a spring-loaded plunger in the roof that could engage it. This would lock the hatch in the vertical position.
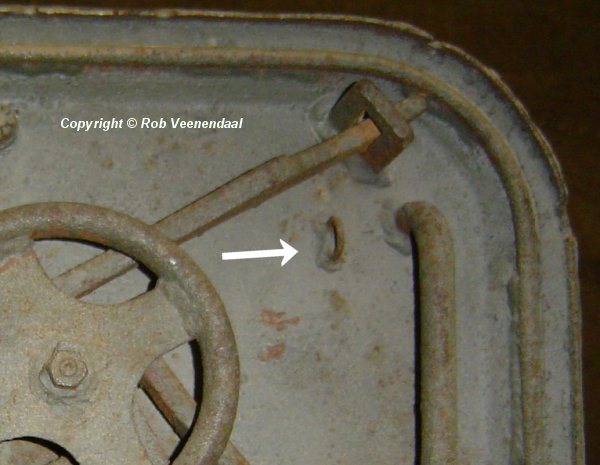
In June 1943, a cable was added to the loader's hatch so that it could be pulled closed without exposing a crewman. The end of the cable was attached to a small welded loop on the underside of the hatch, as shown here in a museum vehicle whose cable is missing.

The only photograph of a complete cable that I can find, is on a similar hatch in a Tiger B. That cable was 250mm long, plus metallic end loops. It had a hand-grip. The Tiger E's cable was probably identical since the vehicles were sharing parts.
This arrangement was preserved into the new turret design of 'Mid' Tigers. But when the turret roof was thickened to 40mm, in March 1944, there was a change. A clip was welded to the turret roof, behind the hatch, to stow the cable.
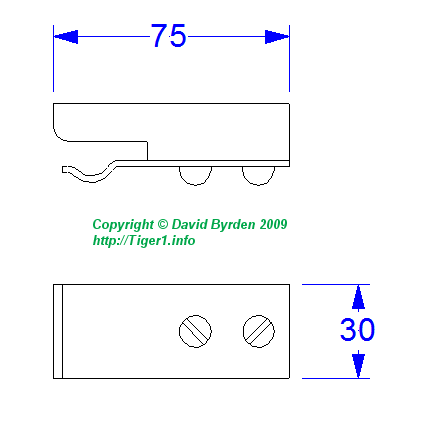
This is the clip.
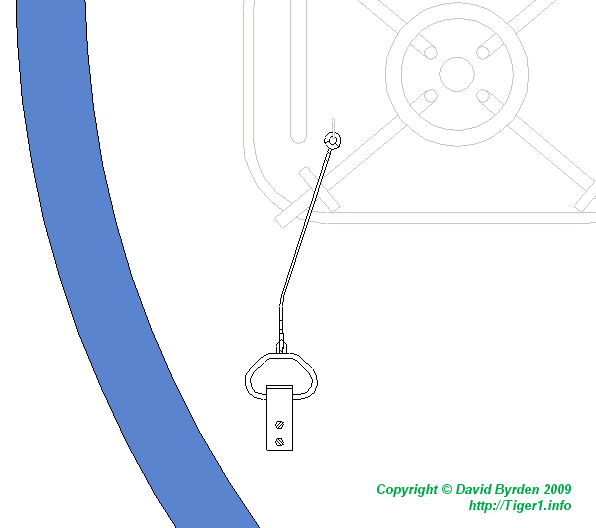
This is the location of the clip and the position of the stowed cable. The hand-grip is held in the clip.
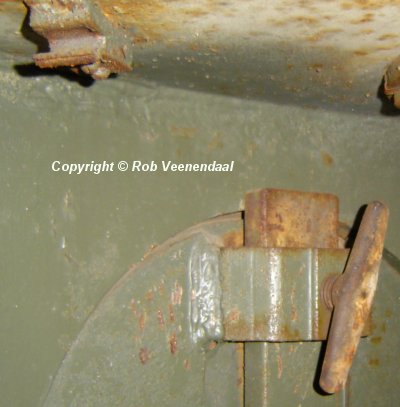
This is the clip in the surviving Tiger at Saumur museum.
I don't know whether Tigers with 25mm turret roofs had a place to stow the dangling cable. But there is photographic proof that they didn't have a clip in the location shown above.
[2] DW to Tiger 1
[3] Survey of vehicle 251114, at Saumur, by Jean-Charles Breucque